How to Change the Color of an Object in Photoshop
Introduction
Have you ever come across a photograph where you wished you could change the color of an object? Perhaps you wanted to see how a different hue would enhance the overall composition or create a specific mood. Well, with the power of Photoshop, you can easily transform the color of any object and bring your creative visions to life. In this article, we will guide you through the process of changing the color of an object in Photoshop, providing you with step-by-step instructions and valuable tips to achieve impressive results.
Understanding the Basics
Before we delve into the nitty-gritty of changing colors, let’s take a moment to understand the fundamentals. In Photoshop, there are various tools and techniques at your disposal to alter the color of an object. These include adjustment layers, blending modes, and masks.
Step-by-Step Guide: Changing Color of an Object
Now, let’s get into the heart of the matter. Follow these step-by-step instructions to change the color of an object in Photoshop:
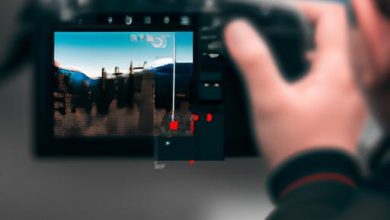
1. Selecting the Object
Begin by selecting the object you want to change the color of. You can use tools like the Magic Wand, Quick Selection, or Pen Tool to make a precise selection.
2. Creating a New Adjustment Layer
Once you have selected the object, create a new adjustment layer. This will allow you to make color adjustments without altering the original image. Go to the “Layers” panel, click on the “New Adjustment Layer” icon, and choose the appropriate adjustment layer for color changes, such as “Hue/Saturation” or “Color Balance.”
3. Choosing the Desired Color
Adjust the sliders or input the values in the adjustment layer settings to achieve the desired color. Experiment with different hues, saturation levels, and tonal variations until you achieve the perfect result. Remember, this is where your creativity can truly shine.
4. Applying the Color Change to the Object
Once you have fine-tuned the color settings, it’s time to apply the color change to the selected object. To do this, simply paint over the object using a brush tool on the adjustment layer mask. This will reveal the newly applied color, seamlessly blending it with the original image.
5. Refining the Color Adjustment if Necessary
Take a step back and evaluate the overall effect. If you feel the color change needs further refinement, you can make adjustments to the adjustment layer settings or modify the mask. You can also use additional tools like the Eraser or Brush tool with low opacity to blend the new color more subtly.
Tips and Tricks for Better Color Changes
To ensure your color changes in Photoshop are of the highest quality, consider the following tips and tricks:
1. Working with Masks for Precise Color Adjustments
Masks allow you to have precise control over which areas of an object are affected by the color change. Use a soft brush on the mask to blend the new color seamlessly with the original image. You can also use a gradient tool to create smooth transitions between colors.
2. Utilizing Blending Modes for Natural-Looking Colors
Experiment with different blending modes available in the adjustment layer settings. These modes can help you achieve more natural-looking color changes by blending the new color with the underlying image in various ways.
3. Using Adjustment Layer Masks for Selective Color Changes
If your object has multiple colors and you want to change only specific parts, you can create multiple adjustment layers and apply masks to each one. This allows you to target different areas with different color adjustments, resulting in a more nuanced and sophisticated final image.
Frequently Asked Questions (FAQ)
Can I change the color of multiple objects simultaneously?
Unfortunately, you can’t change the color of multiple objects simultaneously using a single adjustment layer. However, you can create multiple adjustment layers and apply them to different objects individually.
Is it possible to revert the color change later?
Yes, absolutely! Since you are working with adjustment layers, you can easily revert the color change at any time. Simply hide or delete the adjustment layer, and your original image will be restored.
What if the object has multiple colors?
If the object you want to change the color of has multiple colors, you can use a combination of selection tools, masks, and adjustment layers to target each color individually. This way, you can achieve precise and selective color changes.
Conclusion
Changing the color of an object in Photoshop opens up a world of possibilities for creative expression. With the step-by-step guide and valuable tips provided in this article, you now have the knowledge and tools to transform any object’s color effortlessly. Embrace your creativity, experiment with different colors, and let your imagination run wild. With Photoshop, you are the master of colors!