How to Crop in Photoshop: A Step-by-Step Guide to Mastering the Crop Tool
Introduction
In the world of digital image editing, the ability to crop an image is a fundamental skill that can drastically enhance the overall composition and visual impact of a photograph. Whether you’re a professional photographer, a graphic designer, or simply an enthusiast looking to improve your image editing skills, learning how to crop in Photoshop is a valuable technique to have in your arsenal. In this comprehensive guide, we will walk you through the process of cropping in Photoshop, providing you with step-by-step instructions and essential tips to ensure that your cropped images turn out polished and visually stunning.
Understanding the Crop Tool in Photoshop
Before we dive into the intricacies of cropping in Photoshop, it’s important to have a solid understanding of the Crop Tool itself. Located in the toolbar on the left-hand side of the Photoshop interface, the Crop Tool allows you to define a specific area within an image that you want to keep, while discarding the rest. This tool not only helps you eliminate unwanted elements or distractions from your photos but also enables you to recompose and tighten the focus on your subject, resulting in a more impactful image.
Step-by-Step Guide on How to Crop in Photoshop
Now that we have acquainted ourselves with the Crop Tool, let’s delve into a comprehensive step-by-step guide on how to effectively crop in Photoshop. By following these simple instructions, you’ll be able to harness the power of the Crop Tool and elevate your image editing skills to new heights.
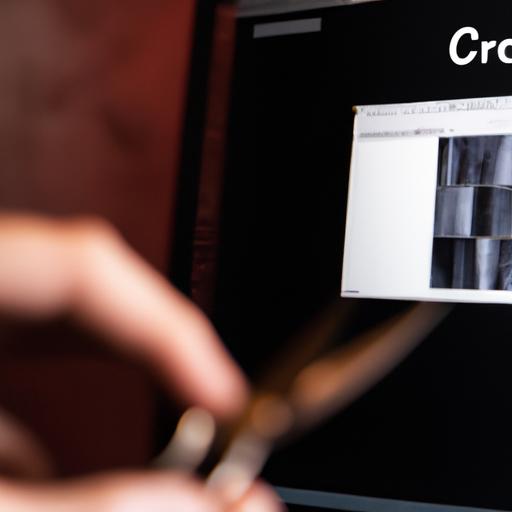
A. Selecting the Crop Tool
To begin cropping an image in Photoshop, you first need to select the Crop Tool from the toolbar. You can either click on the Crop Tool icon or press the letter “C” on your keyboard to activate it. Once selected, the Crop Tool options will appear in the toolbar at the top of the screen.
B. Adjusting the Crop Boundary
After selecting the Crop Tool, move your cursor to the image, and click and drag to define the initial crop boundary. Photoshop provides you with a rectangular marquee by default, but you can also choose other crop shapes like a square or an aspect ratio-specific shape from the options in the toolbar. Adjust the size and position of the crop boundary according to your desired composition.
C. Resizing and Rotating the Crop Boundary
To further fine-tune your crop, you can resize and rotate the crop boundary. Hover your cursor outside the crop boundary until you see a double-headed arrow, then click and drag to resize the boundary. To rotate it, position your cursor just outside the boundary until you see a curved double-headed arrow, then click and drag to rotate the crop boundary to the desired angle.
D. Finalizing the Crop
Once you are satisfied with the position, size, and rotation of the crop boundary, it’s time to finalize your crop. Press the Enter key on your keyboard or click the checkmark icon in the options bar to apply the crop. Photoshop will remove everything outside the boundary, leaving you with the cropped image.
E. Saving the Cropped Image
After cropping your image, it’s crucial to save it in a suitable file format to preserve the quality and compatibility. Go to the File menu, select “Save As,” and choose a file format such as JPEG, PNG, or TIFF. Give your cropped image a descriptive name, select the desired quality and resolution, and click “Save” to store your masterpiece.

Tips and Techniques for Efficient Cropping
While the basic process of cropping in Photoshop is relatively straightforward, there are some essential tips and techniques that can significantly elevate your cropping skills. Consider the following techniques to ensure efficient and visually striking crops:
Maintain Aspect Ratio
When cropping, it’s important to maintain the aspect ratio of the original image to avoid distorting the subject or compromising the composition. Photoshop provides an option to lock the aspect ratio, allowing you to resize the crop boundary while preserving the original proportions. This ensures that your final image remains visually balanced and pleasing to the eye.
Straighten and Level Images
In some cases, your original image may have a slightly tilted horizon or appear slightly skewed. Photoshop’s Crop Tool offers a convenient solution to straighten and level your images during the cropping process. Simply position the crop boundary along the horizon or a straight line within the image, and Photoshop will automatically straighten and level the image as you apply the crop.
Utilize the Rule of Thirds
To create visually pleasing and well-composed images, consider using the Rule of Thirds during the cropping process. The Rule of Thirds divides your image into a 3×3 grid, and the points where the lines intersect are known as the “power points.” Aligning your subject or important elements along these lines or power points can create a more dynamic and balanced composition, adding visual interest to your cropped image.
Frequently Asked Questions (FAQ)
Here are some frequently asked questions related to cropping in Photoshop:
Q: Can I undo a crop in Photoshop?
A: Yes, Photoshop allows you to undo a crop. Simply go to the Edit menu and select “Undo Crop,” or use the shortcut Ctrl+Z (Windows) or Command+Z (Mac) to revert the image back to its original state.
Q: How can I crop multiple images at once?
A: Unfortunately, Photoshop does not offer a direct way to crop multiple images simultaneously. However, you can utilize the Batch Processing feature in Photoshop to automate the cropping process for multiple images, saving you time and effort.
Q: Can I crop images without losing quality?
A: When cropping an image, you are essentially discarding pixels from the original image. However, if you ensure that you are working with a high-resolution image and only crop a small portion, the quality loss will be minimal and hardly noticeable. It’s always recommended to work with high-quality and high-resolution images to maintain the overall image quality after cropping.
Conclusion
Mastering the art of cropping in Photoshop is an essential skill for anyone involved in digital image editing. By learning how to effectively utilize the Crop Tool and implementing the tips and techniques provided in this guide, you can transform your photographs and enhance their visual impact. Remember to maintain aspect ratio, straighten and level your images, and experiment with the Rule of Thirds to create captivating compositions. With practice and experimentation, you’ll be able to crop your images with confidence and produce stunning results that truly stand out. So, go ahead, grab your favorite image, and start cropping in Photoshop today!